A T-Post built fence is your best option for a cost-effective fence that offers longevity and durability. And for the inexperienced looking for the perfect DIY fence project, a T-Post Defender™ built fence is quicker, easier to install, and more effective than most available products.
Ready to Build with T-Post Defender™?
-
- Check your tools; you will need a Measuring Tape, a Post Driver or Mallet, String, and a Spirit leveler (Optional, cement, and spade)
-
- Measure the desired area you plan to enclose. Plan to install a T-Post & T-Post Defender™ every 6 to 8 feet. Decide on the fencing wire you will use.
-
- Shopping list: T-post, Cable ties, Rolled or Fencing panels (Cement optional). Remember to order your T-Post Defender™ here.
-
- Lay out your corner T-Post and mark the spot; running a string, mark the line of your intended fence.
-
- Measure out your desired length between posts and mark each spot.
-
- Using your Post Driver or Mallet, insert each T-Post into the soil, burying at least two feet.
Use your leveler to ensure each Post is installed straight. Important: Make sure each T-post faces the same direction.
- Using your Post Driver or Mallet, insert each T-Post into the soil, burying at least two feet.
-
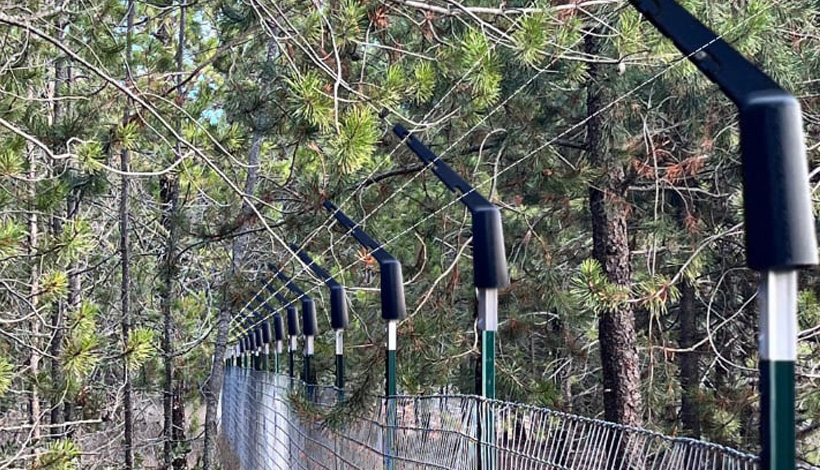
- Once each T-Post is securely installed, attach your T-Post Defender™ to each T-Post.
-
- Run your desired fencing wire or panel, securing with cable ties to each T-Post. For the best results be sure that your fencing is taut.
-
- Run your desired wire option through the pre-cut sections of the T-Post Defender™. (For low-voltage electric fencing, see the Charging manufacturer’s instructions.)
-
- Sit back and enjoy the security of your new T-Post Defender™ built fence.